

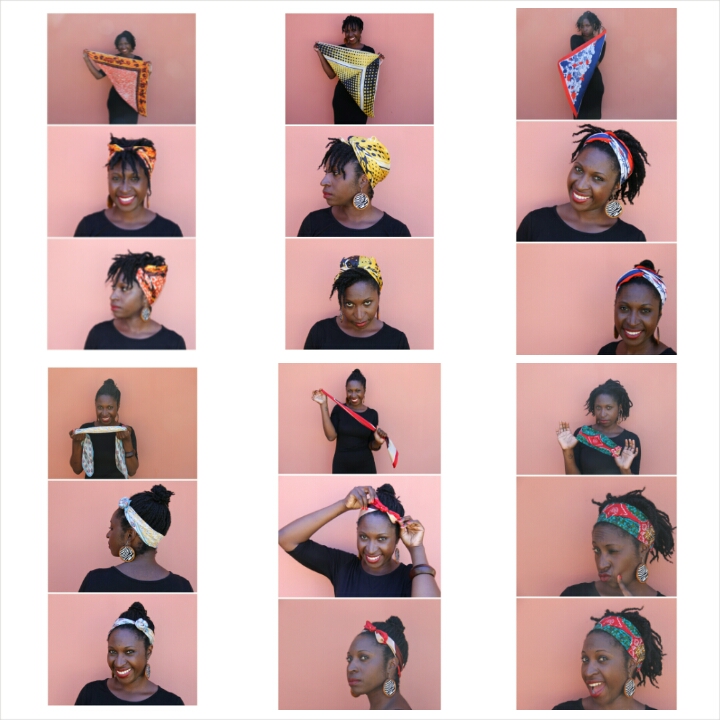
This week is a bit of a cop out but also a style bonanza. It’s a cop out because I’m not really styling my hair but I am going to show you lots of styles that you can achieve with scarves.
My twists are looking a little bit worse for wear but I’m not quite ready to let go of them so I’m doing what I tend to do when I don’t feel like having to deal with my hair and reaching for scarves.
Scarves have been a mainstay of my styling repertoire since my second year of being natural. Scarf styles are really easy to create and will cheer you up on the dreariest of days.
I decided to show you 5 easy scarves to try, seeing as I’m meant to keep my protective styles for 5 days every week.
All my scarves are some sort of smooth, synthetic material like silk, satin or polyester.
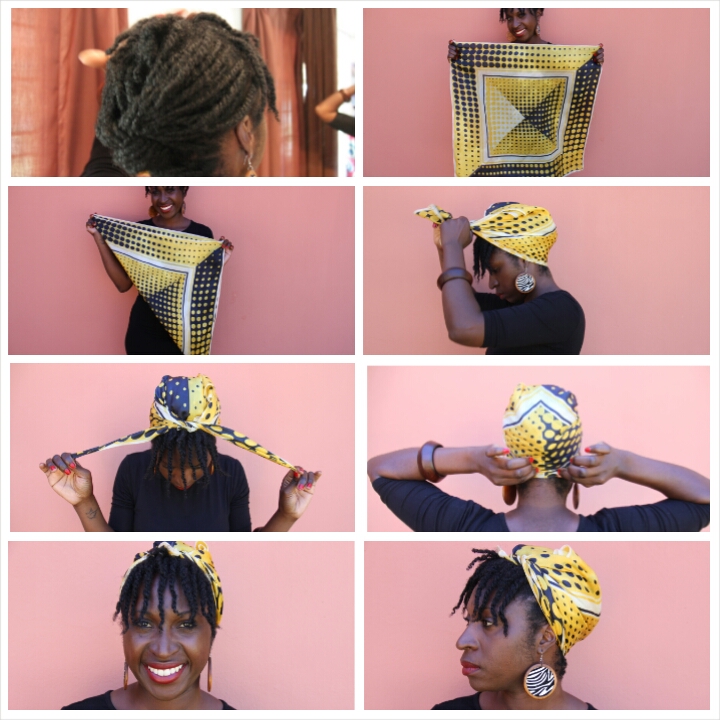
Style 1: The Signature Scarf
I call this one the “signature scarf” because it’s my favourite, my go to style. I don’t get to do it much on loose hair these days, because my hair is a little longer and I would need to use it on shrunken hair to get the kind of look that I like.

You’ll need a square scarf tied in half for this one. Tie it at the front and either tuck the ends of the scarf in or tie them at the back. Make sure the hair around the sides of your head is smoothed upwards. Tuck the triangle at the top in at the back.
If you like to have the hair fall over your forehead you can leave a little hair at the front out and tie the rest up in the scarf as a second option.

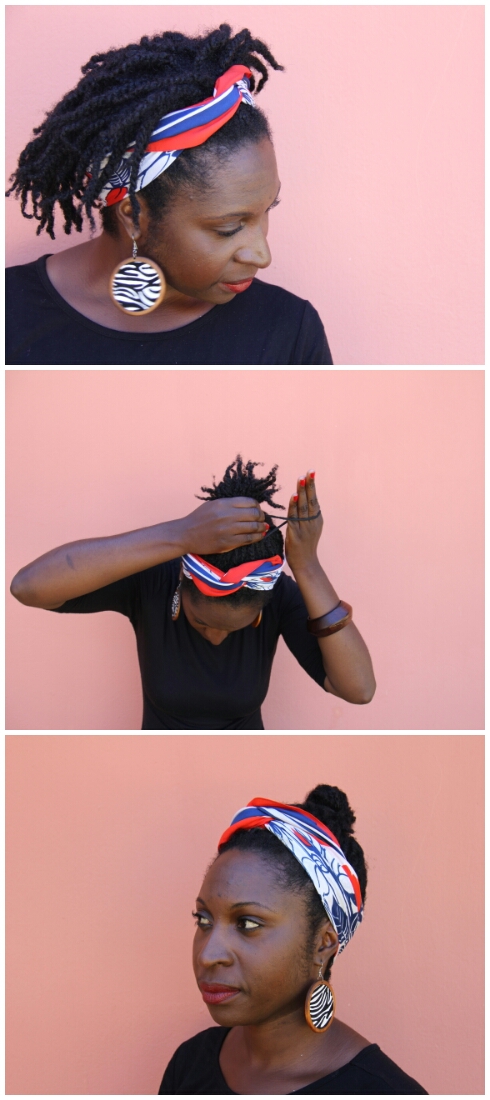
Style 2: The Fringe
Part your hair into two. Leave the front to fall forward and plait the back in a loose braid, it doesn’t matter how neat. You’ll need a square scarf tied in half. Tie the scarf with the knot in between the plaited section and the fringe. Tuck the top of the triangle under the knot. There you have it a fringe.
You can play around with the fringe, using pins to create more of a shape.

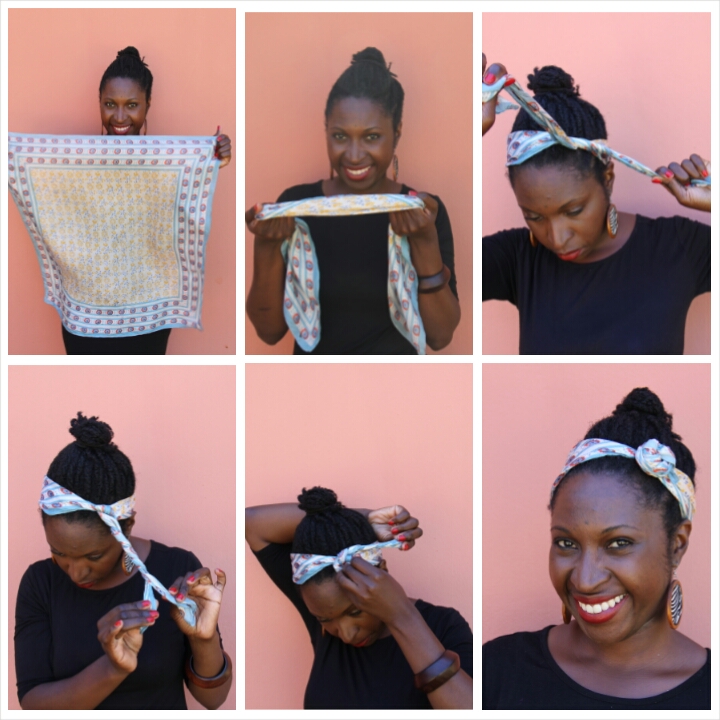
Style 3: Top Knot

Fold a square scarf into a long rectangular shape and tie it as you would a band with the knot at the front. Cross the ends of the scarf again without tying and either tuck in the ends or, if your scarf is long enough, tie them at the back.
You can leave your hair loose or have it in a bun for a more put together look.
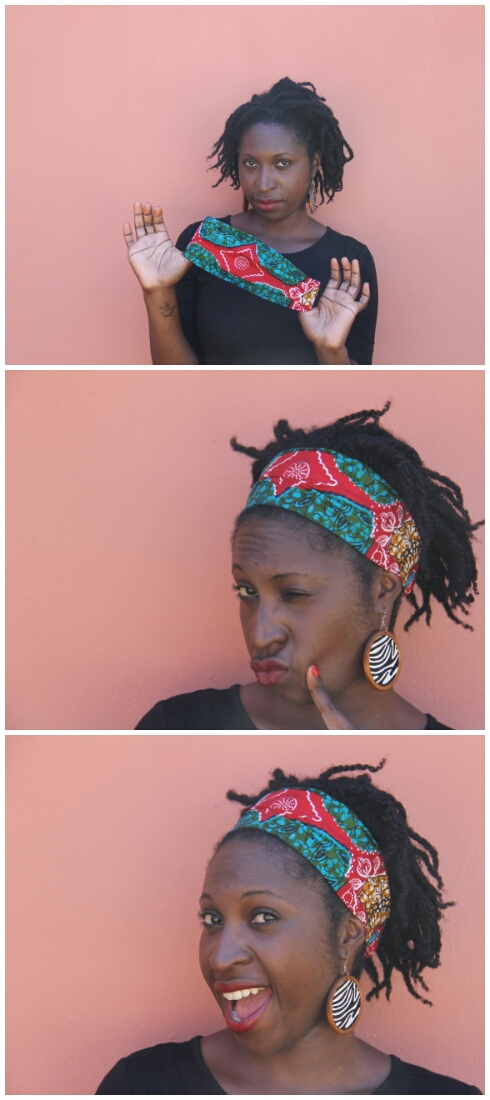
Style 4: Flower power
Fold a square scarf into a rectangular band and tie it at the front. I like to tie this at a skewed angle. Cross the ends of the scarf so that you create a sort of rope. Twist the rope around itself to create a flat flower shape.
Style 5: The Bow

This is the easiest of all the scarves to tie. You’ll need a small square scarf for this one. Fold the scarf into a triangle and then fold the triangle into a rectangular band. Knot the scarf at the front. It already looks like a bow at this point and you can leave it if you like but I prefer to tuck the ends in.
Bonus Style!
This is not one of my scarf creations. It’s a ready made Chitenge (African print) hair band for those days when you really just want to get up and go.
There you have it; 6 scarves, 9 hairstyles! Is there any better way to disguise your shabby twists?
Next week my hair comes out to play for a bit.

Pingback: Protective Style Challenge: Week 24; Bad Hair Day Hacks | ZedHair·
Pingback: Protective Style Challenge: Week 43; Hats | ZedHair·
Pingback: Natural Hair Trend: Hair Scarves / Wraps for Summer 2016 | HerGivenHair·